For many urban and suburban gardeners, limited space is not a barrier to growing fresh vegetables, herbs, or flowers. A small backyard plot can produce a surprising amount of food if managed well. One of the most efficient ways to keep your crops healthy is through drip irrigation—a watering system that delivers water directly to the plant roots in slow, steady amounts. Unlike traditional overhead sprinklers, drip irrigation minimizes water waste, prevents evaporation, and promotes healthier plant growth.
This article explores how to set up a backyard drip irrigation system for small plots, the benefits, and best practices for long-term success.
Why Choose Drip Irrigation for Small Plots?
- Water Efficiency: Drip systems use up to 50% less water than sprinklers by targeting only the root zone.
- Improved Plant Health: Prevents wetting of leaves, reducing the risk of fungal diseases and pests.
- Time-Saving: Once installed, the system automates watering, freeing up time for other gardening tasks.
- Soil Preservation: Maintains consistent soil moisture without runoff or erosion.
- Scalability: Easily expandable if you decide to increase the size of your garden plot.
Key Components of a Backyard Drip Irrigation Setup
To design an effective system for a small backyard plot, you’ll need a few essential components:
- Water Source: Typically an outdoor faucet, rainwater barrel, or a small tank.
- Filter: Ensures dirt and debris do not clog emitters.
- Pressure Regulator: Drip systems work best at low pressure (usually 10–30 psi).
- Mainline Tubing: A flexible pipe (often 1/2 inch) that distributes water across the plot.
- Drip Lines or Emitters: Smaller tubes or devices that release water at set intervals.
- Connectors and Stakes: Used to secure lines and connect different parts of the system.
- End Caps: To close off lines and maintain pressure.
Step-by-Step Guide to Setting Up Drip Irrigation
Step 1: Plan Your Layout
- Sketch your garden bed, marking where plants are located.
- Decide if you’ll use inline drip tubing (with pre-spaced holes) or individual emitters for each plant.
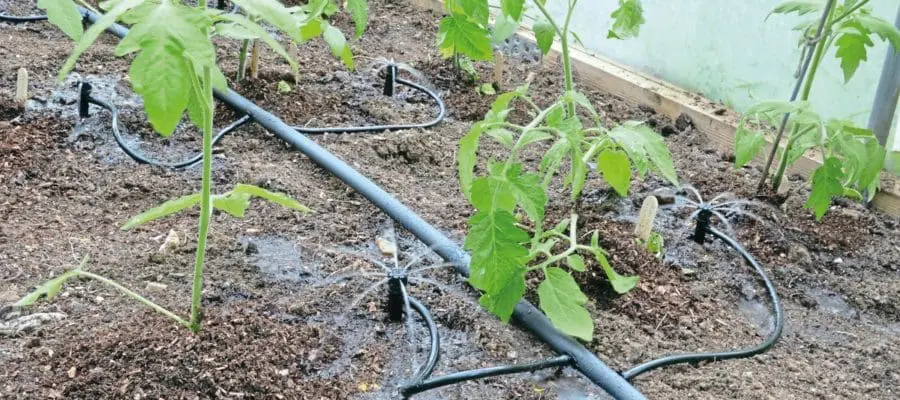
- For rows of crops like lettuce or carrots, inline tubing works best; for larger plants like tomatoes or fruit shrubs, individual emitters are more efficient.
Step 2: Install the Mainline Tubing
- Connect your main tubing to the water source using an adapter, filter, and pressure regulator.
- Lay the tubing along the edge or center of your garden bed.
- Use garden stakes to secure the line in place.
Step 3: Add Drip Lines or Emitters
- Punch holes into the main tubing where plants are located.
- Insert emitters or attach drip lines leading to each plant row.
- Ensure water delivery matches plant needs:
- Vegetables: 1–2 gallons per hour (GPH) emitters.
- Herbs and flowers: 0.5–1 GPH emitters.
- Fruit shrubs or trees: 2–4 GPH emitters.
Step 4: Test the System
- Turn on the water and check for leaks or blockages.
- Ensure each plant receives a slow, steady drip.
Step 5: Cover and Maintain
- Cover tubing with mulch to reduce evaporation and protect against UV damage.
- Check emitters regularly for clogs.
- Flush the system at the beginning and end of each season.
Tips for Small Backyard Plots
- Use Timers: A simple irrigation timer automates watering, ensuring consistency.
- Combine with Rain Barrels: Save water and reduce bills by connecting your system to collected rainwater.
- Seasonal Adjustments: In cooler months, reduce watering frequency to prevent root rot.
- Modular Design: Keep the system flexible so you can rearrange lines when you rotate crops.
Cost Considerations
A basic DIY drip irrigation kit for small plots may cost between $25 and $60, depending on the size and number of emitters. More advanced setups with timers and rain barrel integration can range between $80 and $150. While the upfront investment may seem high, long-term water savings and increased yields make it worthwhile.
Conclusion
Drip irrigation is a smart and sustainable choice for backyard gardeners with limited space. By delivering water directly to plant roots, it maximizes efficiency, conserves resources, and promotes healthier growth. With the right setup and maintenance, your small plot can thrive with minimal effort, turning your backyard into a productive and eco-friendly oasis.
Disclaimer
The information in this article is provided for educational purposes only and should not be taken as professional agricultural or engineering advice. Always follow local guidelines and consult with experts if you are unsure about installation, water pressure, or maintenance for your specific backyard setup. The authors and publishers are not responsible for any damages, losses, or issues resulting from the use or misuse of this information.